Word Dynamics Add-In 
If you want to use data from Microsoft Dynamics 365 in your Word document, and the default templating
does not provide for all your needs, maybe this Word Dynamics Add-In is something for your organization. For example, when documents are created within SharePoint and you would like to
get data from Dynamics into these Word documents, or if you would like to include data of multiple unrelated entities, or when needing data on a more ad-hoc basis, this Word Add-In might
be what you are looking for. And you are in luck, the code is made available by me as an open source project.
A zip file containing the release version is also available, so only configuration and hosting is required for getting up and running.
This Add-In has 3 options:
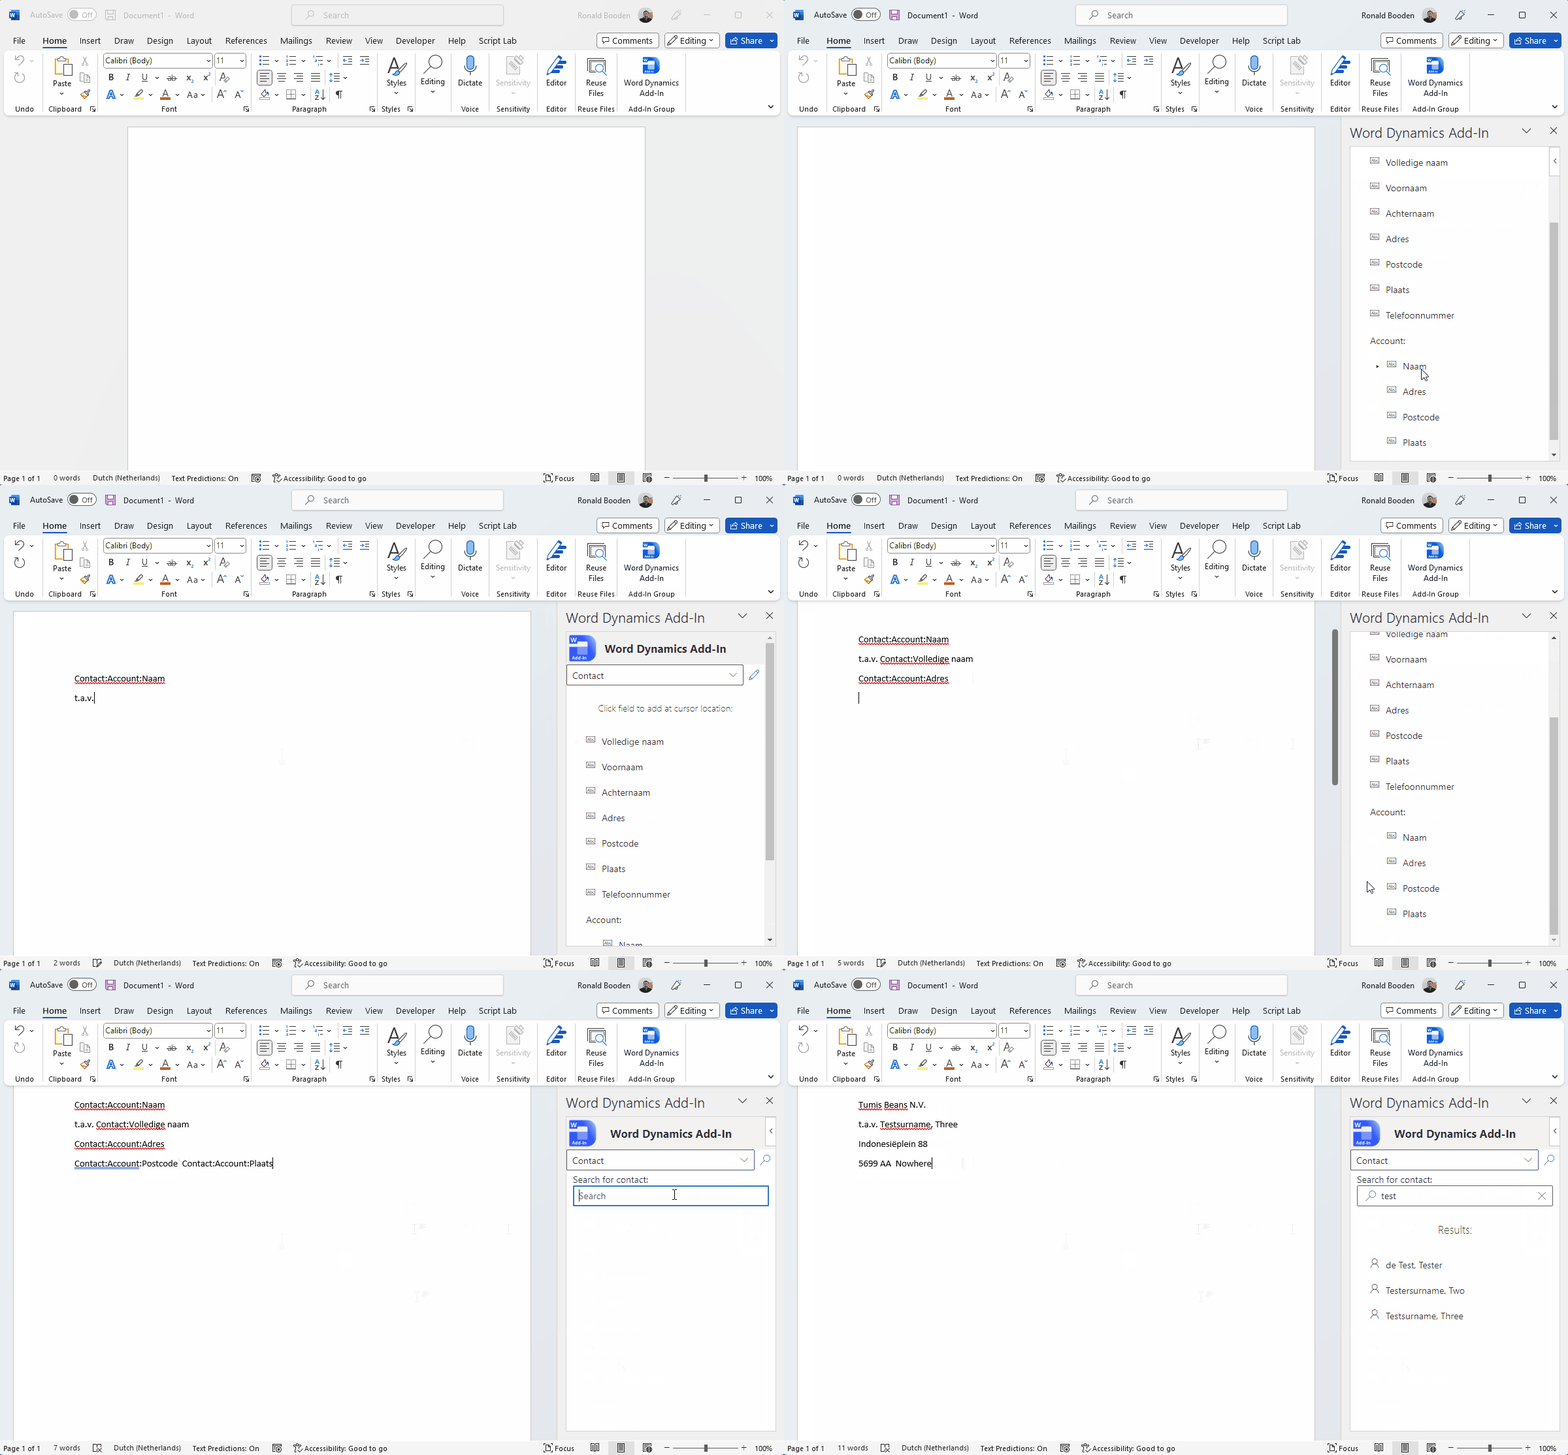
- Searching for and adding data from Dynamics 365 in a Word template - Search mode
- Adding available fields to a Word template - Edit mode
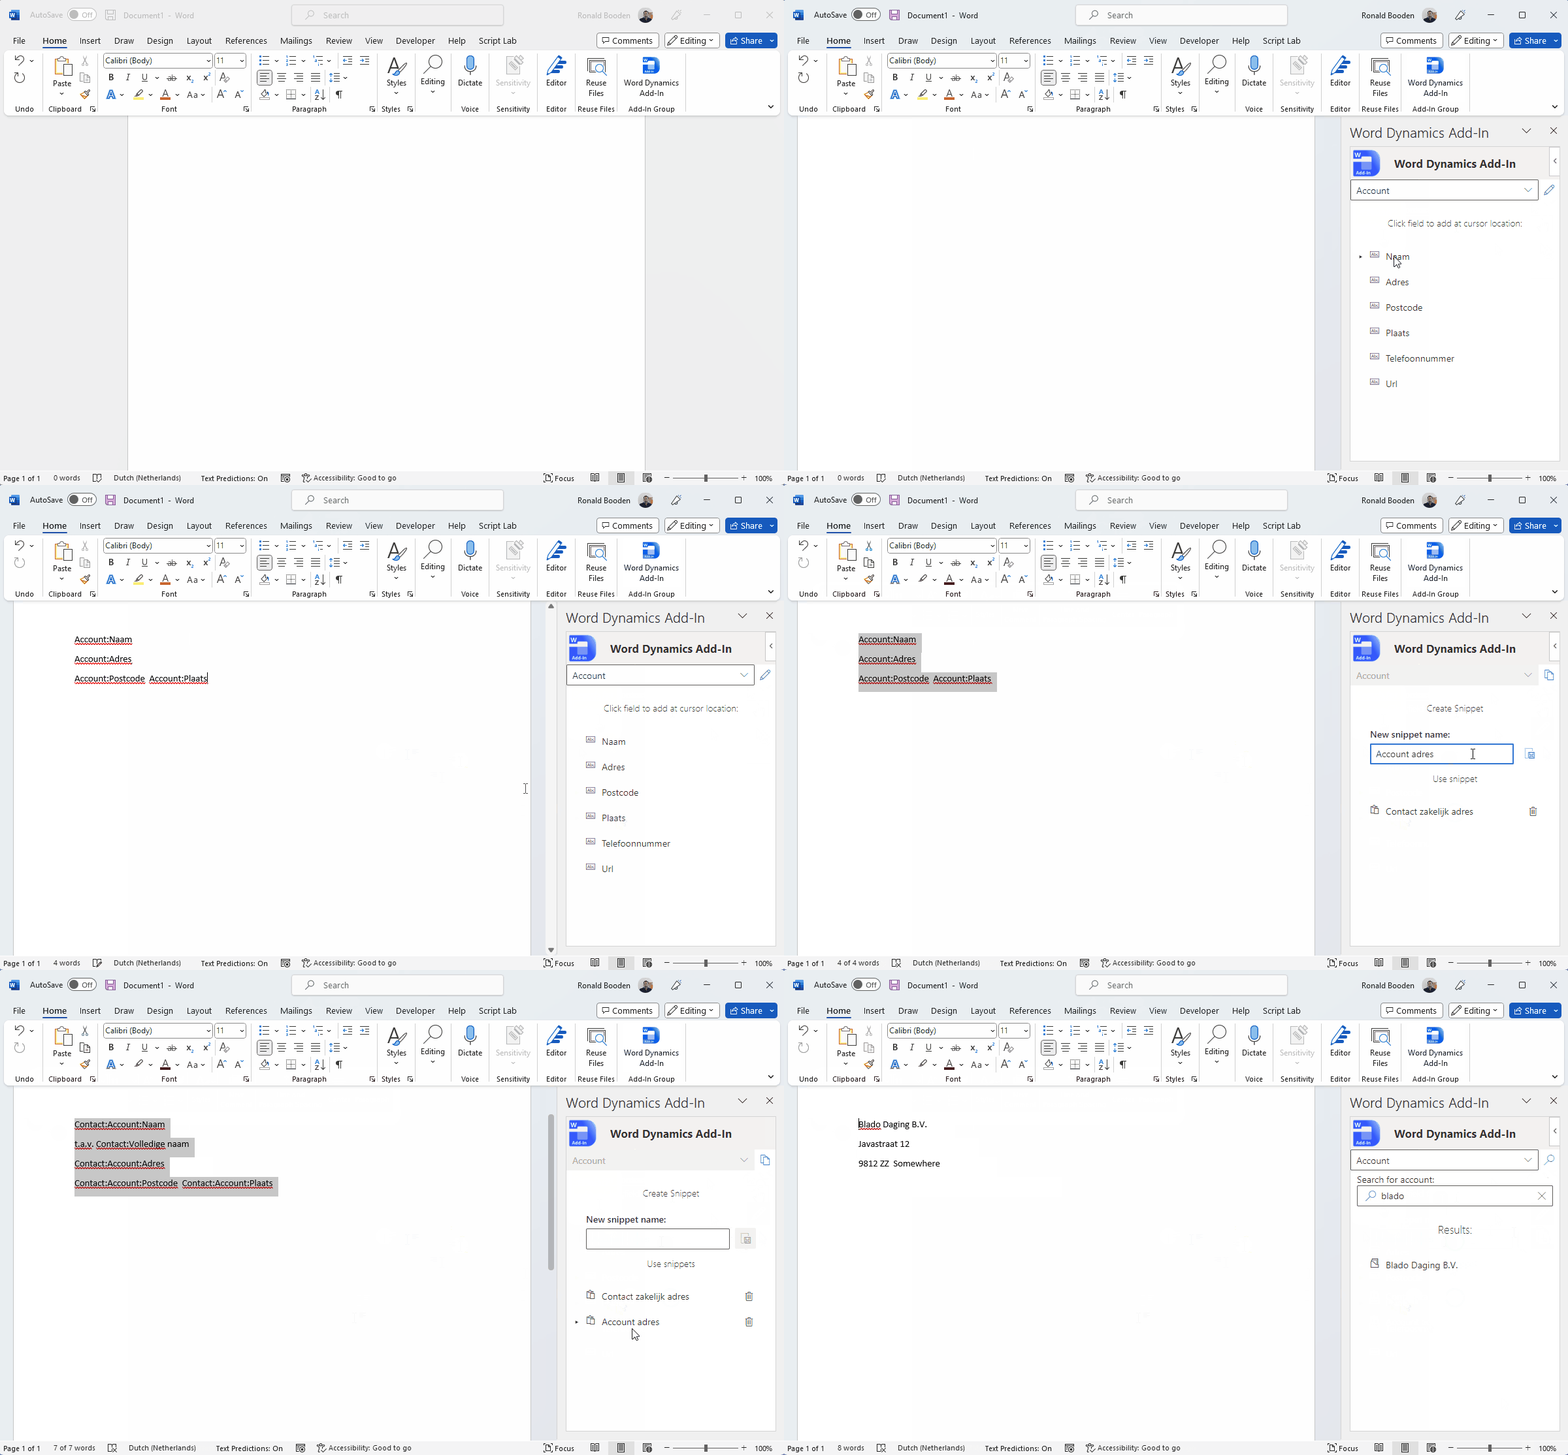
- Creating personal Word snippets for adding blocks of fields in a Word document - Snippet mode
I have created two animations of how you can use the Add-In, first an editing and usage animation:
show/hide

Secondly a creating and using snippets animation:
show/hide

The readme on GitHub also contains some textual description of how to use this Add-In.
I have used Dutch display names for the fields that I preconfigured, this can be updated to another language. This Add-In also
supports adding multiple user interface languages (multi lingual support), by default en-us English and nl-nl Dutch are provided,
additional language files can easily be added. If present, the language used will match the user interface language used for Word.
Configuration can be done in a settings.json file, a basic sample containing Contact and Account, where some fields of the Contact
including fields of the Account associated with the Contact, and some of the fields of Account are made available. Doing this configuration
does require some experience with the json format
and preferably also with the Dataverse API,
but I have added a description on how to find the available entities and fields of an entity using Dataverse urls in the readme. The readme also contains a description of all
possible configuration options.
Good to know, your snippets will be stored in your OneDrive. If you created snippets that another user also would like to use, these
snippets can be found in the Apps folder in your OneDrive, where you will find another folder with the name the application was registered on,
there you can find the snippets.json file containing your snippets. If you share the file with another user gets, the user needs to copy it into the same
folder location on their own OneDrive, they now have a copy containing the same snippets, newly added snippets will not be include shared until the file is
copied again, but take care not to overwrite already existing snippets. Lastly, the mode you selected last, and the last entity selected will be stored within the browser
(localstorage for the techies), of course only if available.
Technical details
This project was created using C# (.net 7 core) for the back-end and JavaScript in the form of TypeScript with React on the front-end. The back-end was created using
the dotnet cli 'dotnet new mvc --auth SingleOrg --client-id [your clientid] --tenant-id [your tenant id]',
the front-end using yeoman 'yo office' and
I am using VS Code as editor.
The back-end is using mvc, because I chose to host the front-end within the back-end solution, but the main controllers are webapi controllers. For connecting
to Dynamics data, I use the Dataverse API, and created a simple get proxy. A back-end is required as we need 'on behalf of' permissions from the Word Add-In. For
more information on this see: Enable single sign-on (SSO) in an Office Add-in
and Office-Add-in-ASPNET-SSO.
For storing the snippets I used The easiest way to store user settings of your Microsoft 365 app
and created two typed endpoints. I kept the back-end quite minimal and forward response code and the retry-after header if applicable, so the front-end can handle
this. I really try to adhere to the KISS Principle.
To automate building and updating the front-end I have added a npm script that can be run to build and update, use npm run update-addin:dev or npm run update-addin
you will need to start this from the addin folder. For debugging then use Run -> Start Debugging (F5) for starting the back-end and do a npm start to start the front-end. Please update your webpack.config.js and
manifest.xml on the front-end and appsettings.json on the back-end first. This will require you to create an app registration, so you have the details that are
needed. I provided a PowerShell script (CreateAppRegistration.ps1) to create the app registration (requires the Azure CLI and permissions to create an app registration), the readme provides a link
to Microsoft documentation on how to configure this manually, including some additional instructions. This PowerShell script can also set all the settings, but only when the
placeholder values are still in place, like in the release zip file.
In the front-end I started out using class components, as I was used to that, although I also used Functional components in the past. I now also provide a branch containing the Functional components using hooks, so
I called that the hooks branch, so you can start with that if you prefer. I haven't done react programming (spfx in my case) for over 1.5 years, so I really
needed to get into it again. Also, I looked into Office Add-Ins a long time ago, and once created a sample, so this is my first real Office Add-In. As I am an experienced
developer that should not be a problem. Then again, I did find a lot of bug/issues while testing, I call that 'bugs maken' Dutch for creating bugs, but it can also be interpreted
as fixing bugs. Just so you know the code might not be perfect.
I did test the Add-In, both the Class component version and the Functional component version, and also used the
Microsoft Graph Developer Proxy for testing how it works when things don't
go as expected. In the Program.cs you will see a comment section for enabling this proxy on your local machine. Great stuff, I found out that I missed forwarding
the retry-after header that I used in the TokenService.ts for delaying the retry of the api call. I also tested the Add-In in Word Online, and did some adjustments
to use only features that are also available in Word Online. So I hope that most of the issues are currently resolved.
I created this with a client of mine in mind, and they probably would be interested in using this, but foremost this is a great way to keep my skills up to date, a
personal hackathon I guess. Getting this finalized and documenting did take some extra time, also because I thought of new features and because I wanted to add Functional
components for React, although that was less work than creating the documentation.
I hope this Add-In is useful to others, and I think that it can also be seen as a more extensive 'real world' example of creating a SSO Word Add-In. Hope this
will inspire others to create Add-Ins for Office.